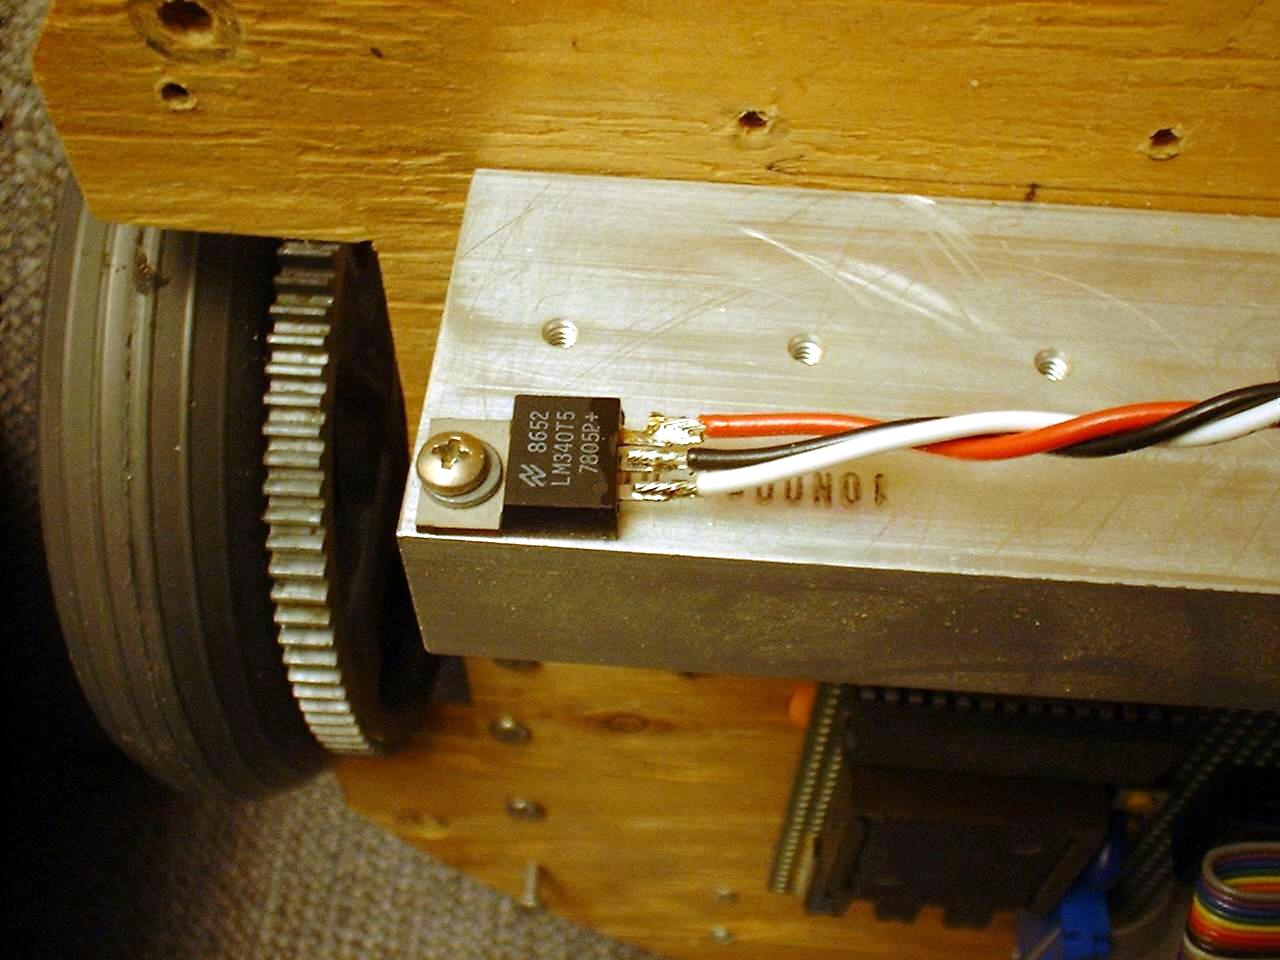

Three examples of soldered connections.
This page started on 12/30/00 and last updated 09/26/2010
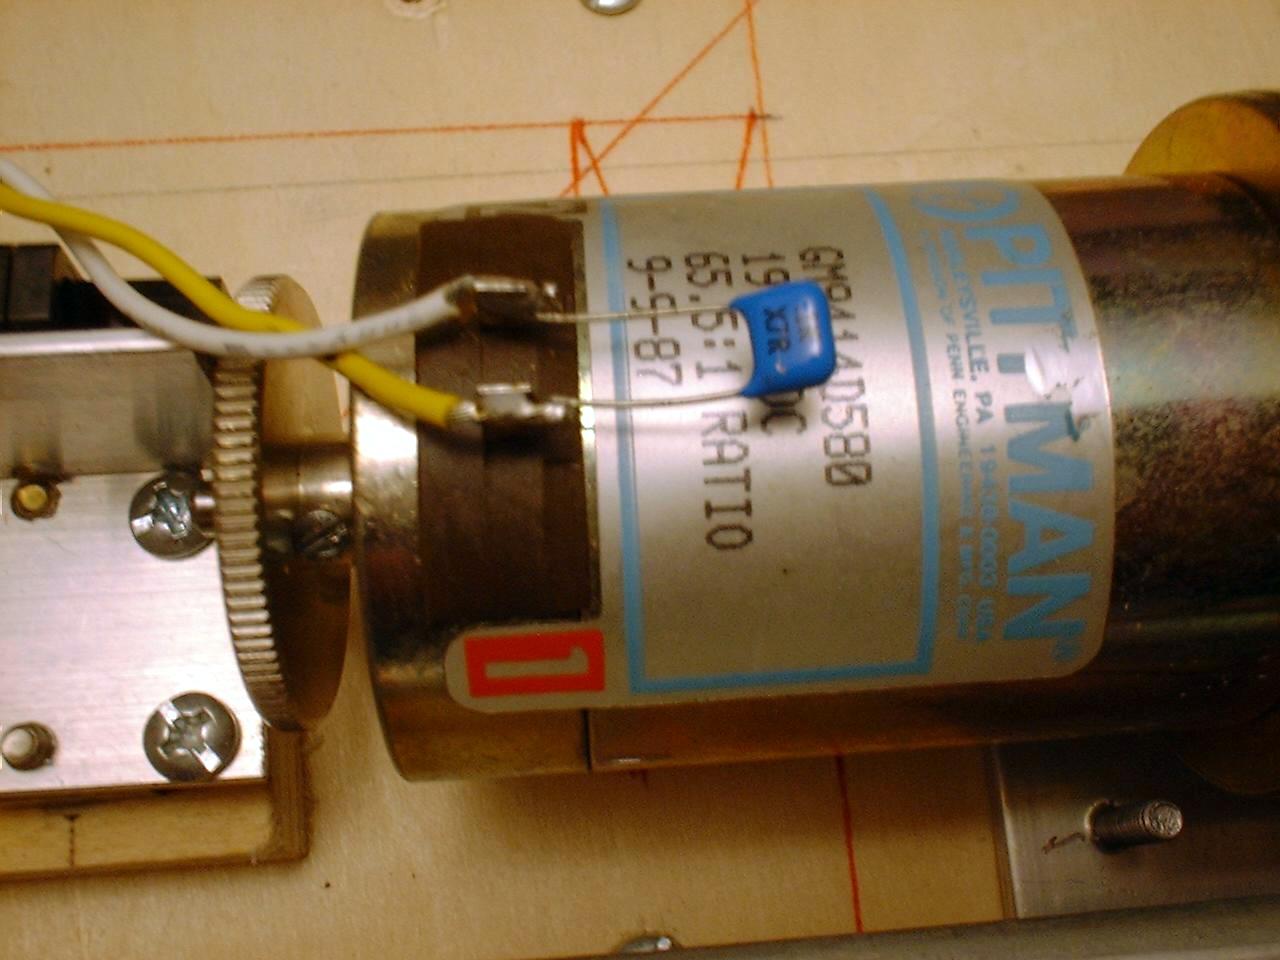
These photos show different devices with soldered connections. The first one shows a voltage regulator which is bolted to a heatsink. The second one shows wires and a capacitor soldered to motor terminals. The third one shows wires soldered directly to a PC board. Just keep in mind these are permanent connections. (Until you unsolder them.)
Some text.

Some text.
Wire-wrap has been around a long time. Basically you have square pins and wire is wrapped around a pin to make the connection. Wire-wrap sockets are available for standard DIP I.C. packages. If you look around you can also find other types of sockets available.
You can connect two boards together with wire-wrap wire. But the standard 30 gauge wire is made from steel (or iron) and is more brittle than copper wire. This leads to the wire breaking if it is flexed much. So it is best to have the boards mounted solidly if using 30 gauge wire-wrap wire to connect them.
The actual connection is made using a wire-wrap tool. It looks much like a screwdriver. It has two holes in the business end. One in the center which slides over the pin to be wrapped. The other hole is offset from the center. The wrie to be applied is slipped into this second hole. As the tool is turned the wire wraps itself around the pin.
You can also find power wire-wrap guns. They are electric or pnuematic. But for occasional use the hand operated wire-wrap tool is adequate.
Back when I did alot of wire-wrapping I was amazed that it usually cost more for the socket than for the I.C. Over the years I have collected wire-wrap sockets when I found them at a cheap price.


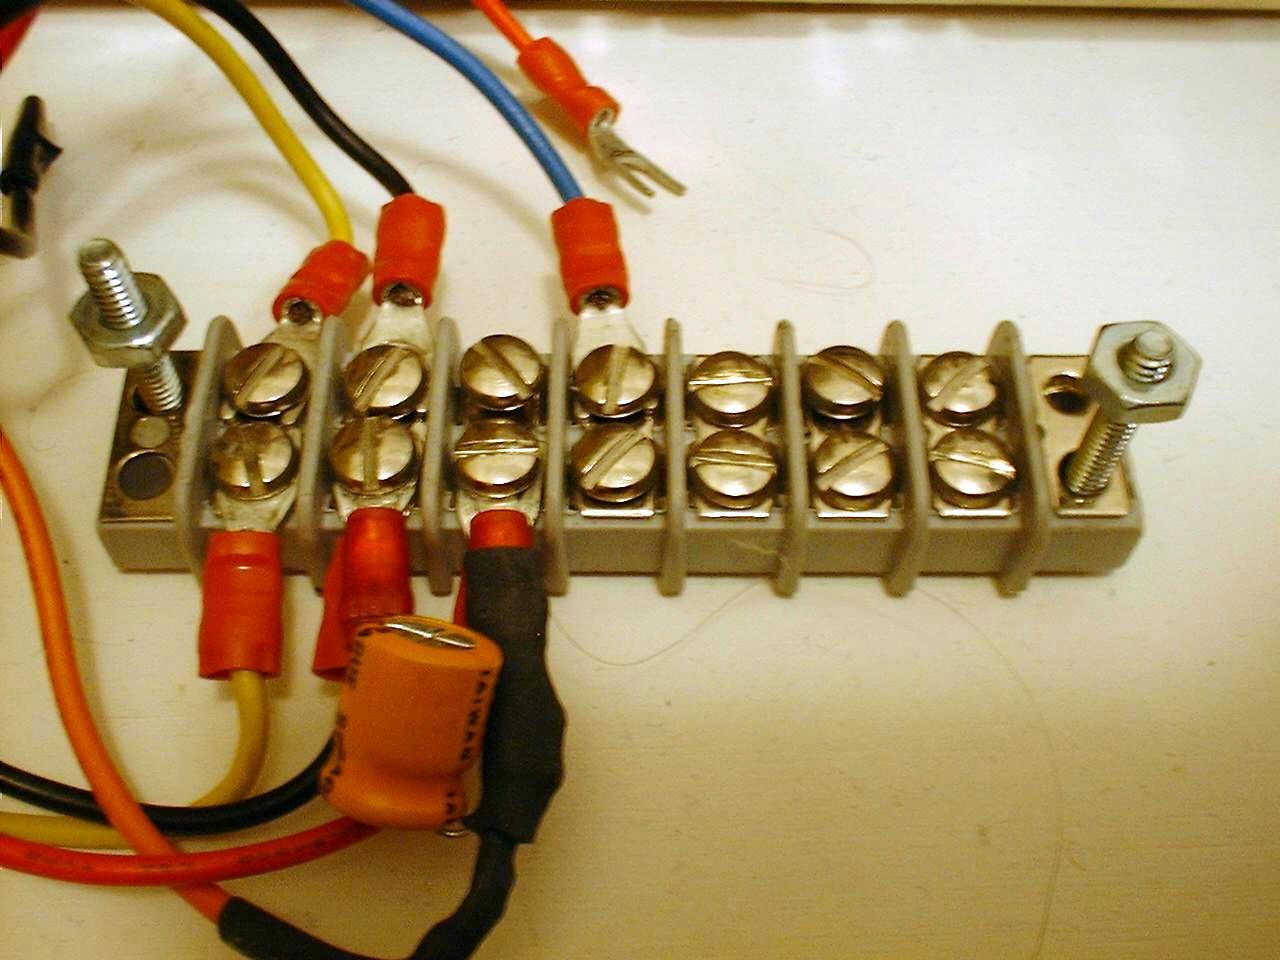
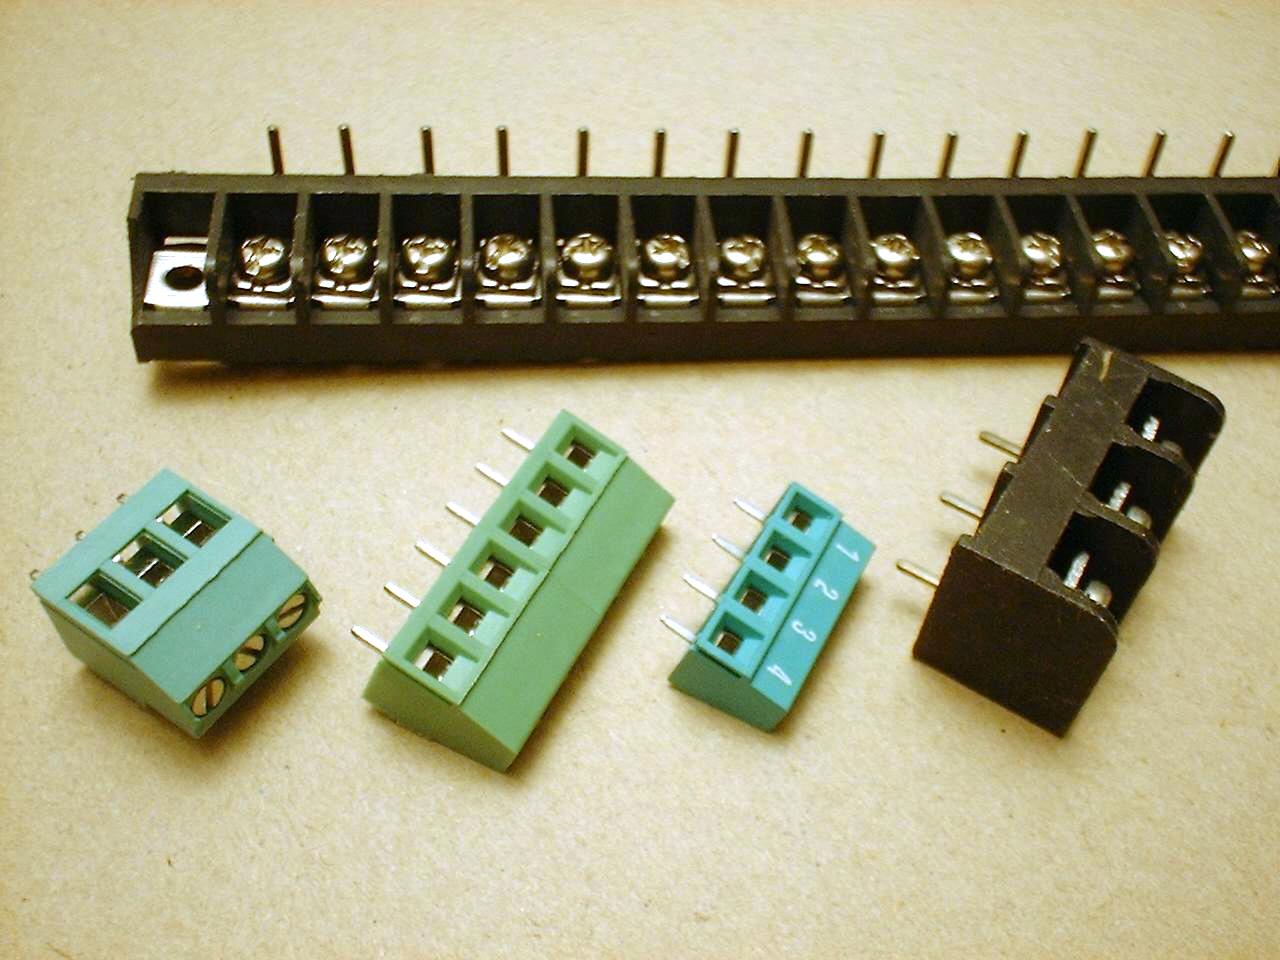
Screw terminals can be handy. They come in various sizes. You can get PC mount type and also simple terminal blocks you connect multiple wires to. The smaller PC mount type are designed to have a wire inserted and screwed down. The larger type work well with a crimp-on connector.
If you use stranded wire with a screw terminal I recommend tinning the wiring with solder before connecting it to the screw terminal. This prevents the individual wire strands from fraying and possibly causing a short.
09/25/2010 I received the following comment:
Hi,
I note that you advise the tinning of wires for use with screw terminals. This is a bad idea as the solder is soft and can cause long term creep at the terminals. This practice is prohibited in the UK wiring codes and also in EN 60950 which is the European design code for consumer electronics safety. It is far better to use a bootlace ferrule when using fine wire, or use a terminal that is designed for fine wire.
Regards
James Salisbury
So I guess that tinning the wire is a bad idea for commercial applications. I will probably continue to do so for my hobby projects if I don't have a crimp-on connector handy. Thanks James.
Even though the terminal blocks (as seen in the first photo) are very handy, they seem to take up alot of valuable space. My robot projects are usually quite large so it isn't a big problem for me. They are available in smaller screw sizes also.
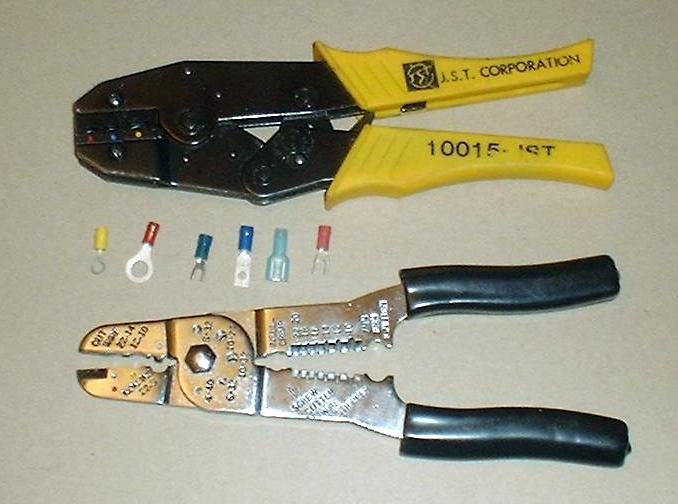
Crimp-on terminals provide an easy way to terminate individual wires. This provides a clean connection to a screw terminal. The terminals come in a variety of sizes and types. They are applied using a crimper. You can get "cheap" crimpers at auto supply stores and hardware stores. They work, but not very well. (In my humble opinion) The high quality yellow handle crimpers in the picture are a pair I picked up at a swap meet for $10. A pair from AMP or other major brands seem to run around $80 for some unknown reason...
The terminals are available at Radio Shack, auto supply, hardware and lots of other stores.
This type of connector allows an easy way to make a cable removeable. You can cut the cable and install this inbetween the two ends. These are available at Radio Shack and most electronics suppliers. (Maybe even auto parts stores) They come in at least two different pin sizes. Right off hand I know you can get them with pins ranging from 2 to 12, maybe bigger.
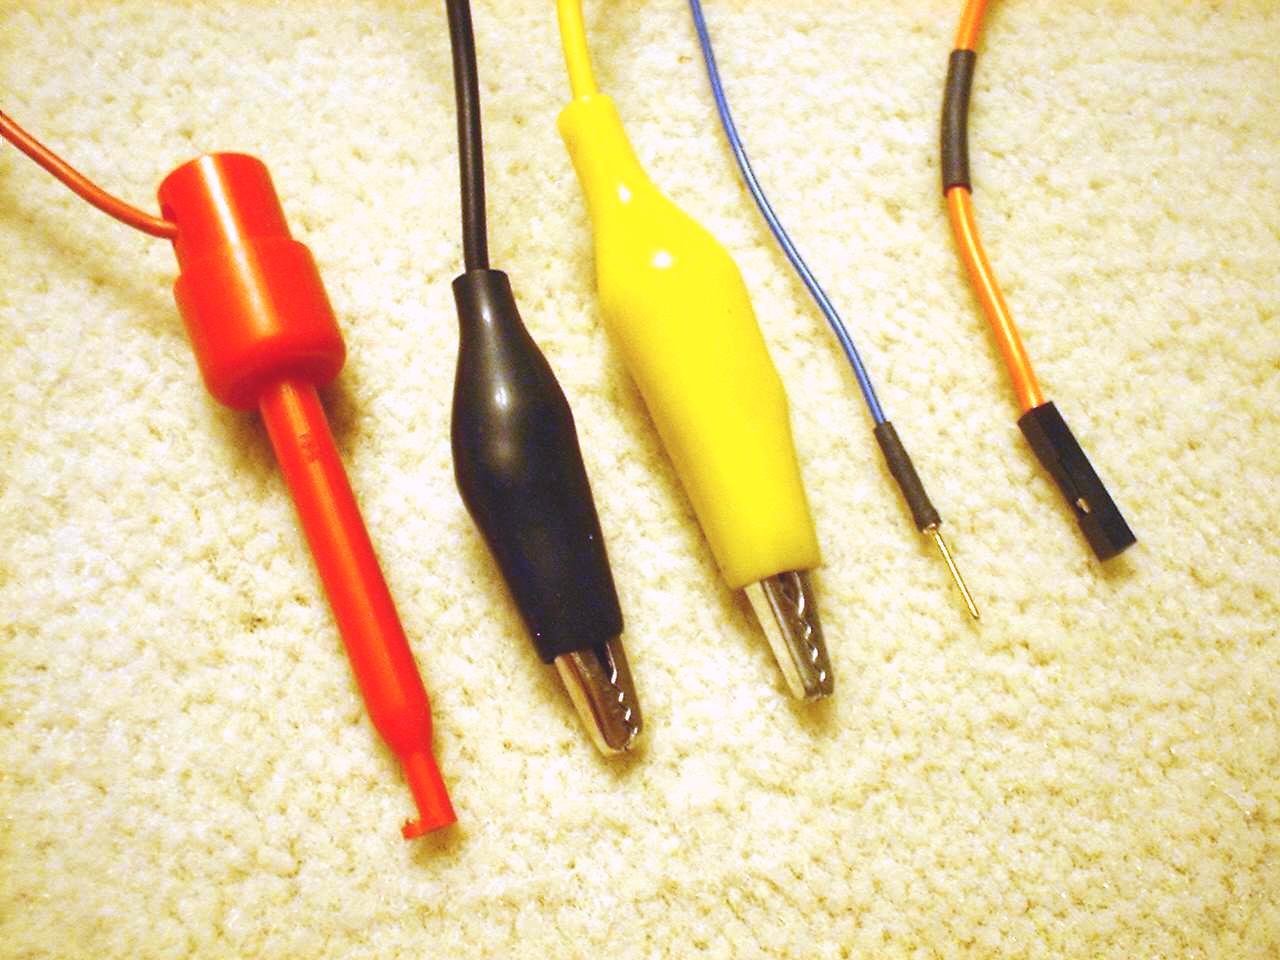
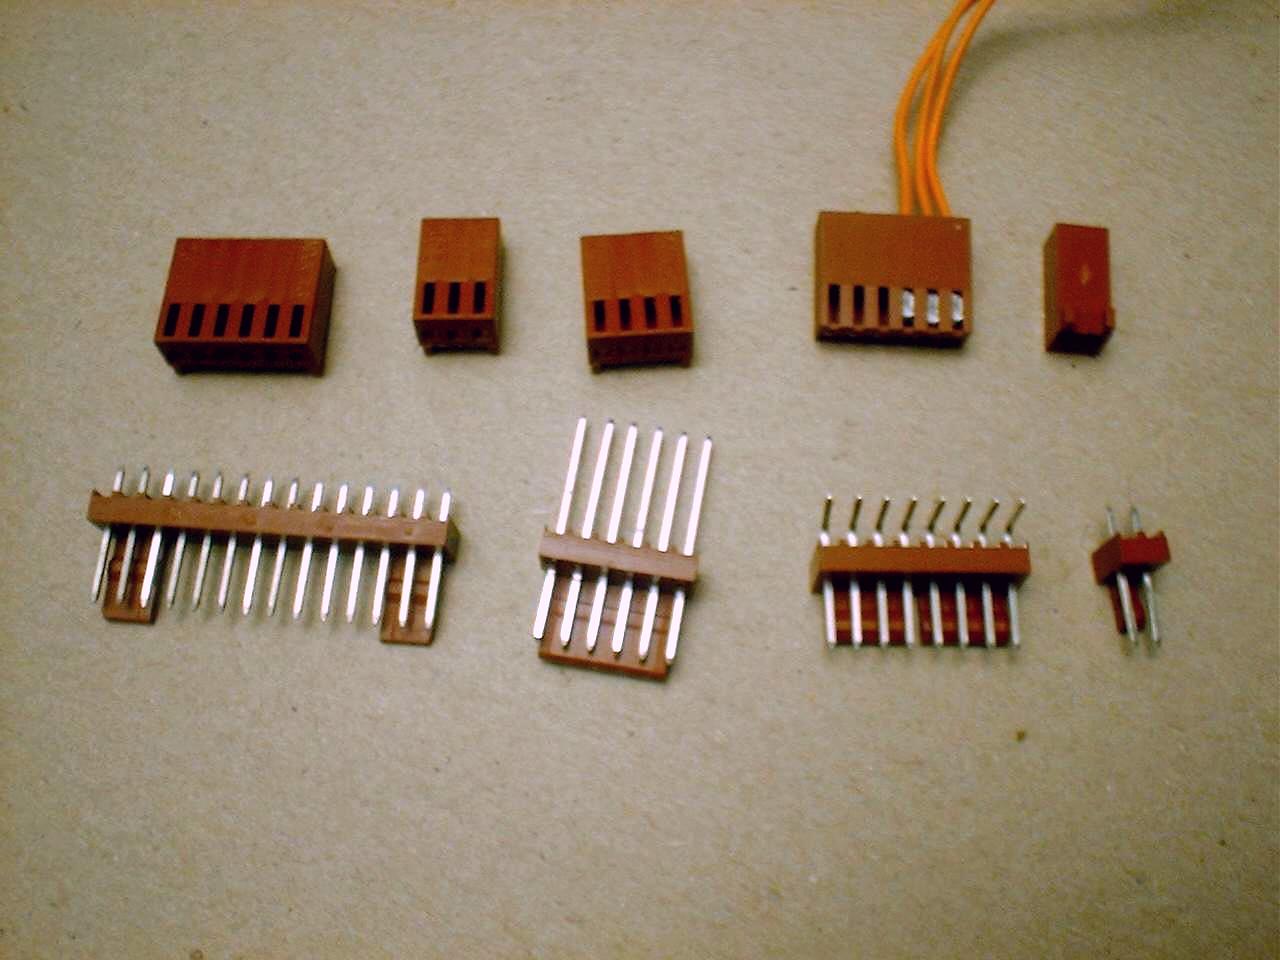
Pin connectors provide a very flexible way to terminate your wires. They come in two basic types. Single wires and muliple wires (like ribbon cable). The multiple connection are presented on the next page. I use two differnt size of conectors.
The smaller, red ones are Molex/Waldon connectors. The pins are .1" on center so they fit in standard perf board. I get them from DigiKey. You buy the pin blocks, socket blocks and pins separately. They come in lots of sizes so you pick the size you need for the application. (Some times it is good to have all the connectors on a board be different sizes. Then you can't plug the wrong one in by mistake.) You can get a crimper for the socket pins, but I can't find mine at the moment. I usually solder the pin whither I crimp it or attach it by hand. I've had too many come loose if I don't solder them.
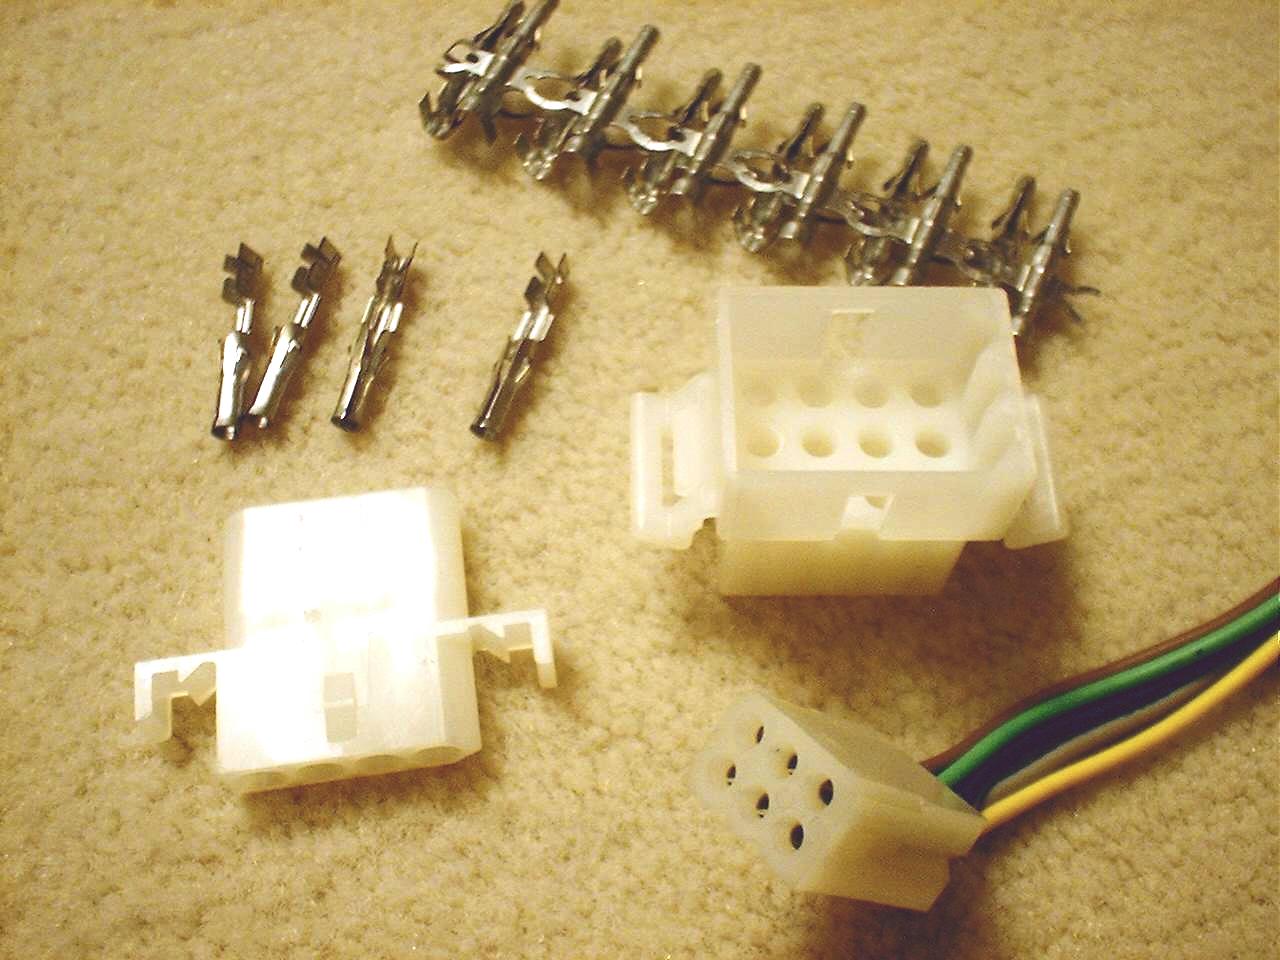
The other type have the pin permanently mounted in the socket block. You crimp the wire into the socket itself. These come in at least two different sizes. I have .1" and .156" pin spacing sizes. The larger size are rated at around 3 to 5 amps. They are made by AMP and Panduit and others. I managed to find a pistol crimper for the large and small ones and surplus stores. (These are something else that cost too much when they are new. I think they are over $100. :-O ) I also found a hand crimper which you can see in the photo.

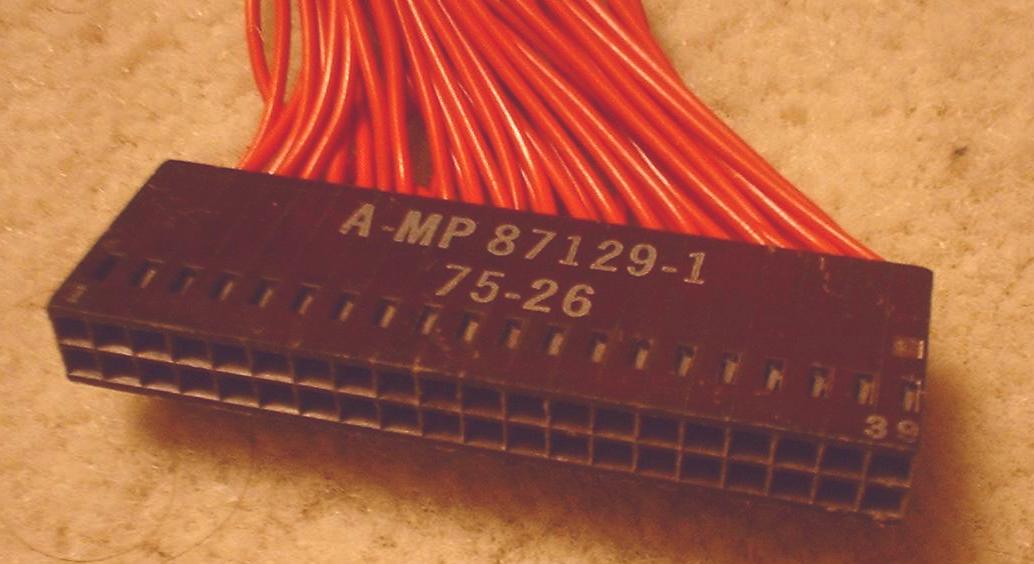
This is another type of pin connector. They come as single in-line or dual in-line. They are end and edge stackable. (Which means you can insert them side-by-side.) So you can mix and match them on a larger block of connector pins.
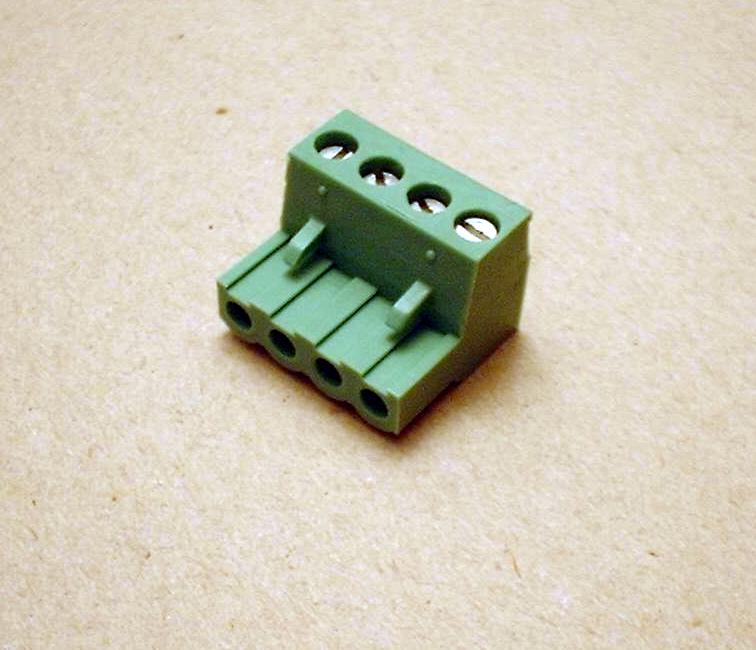
A pin/screw connector offers an interesting alternative. It allows individual wires to be attached at random since each pin has a screw terminal. It also allows the whole connector block to be pulled off the pins when removing the board. (Note: I didn't have the pin block handy for the photo.)
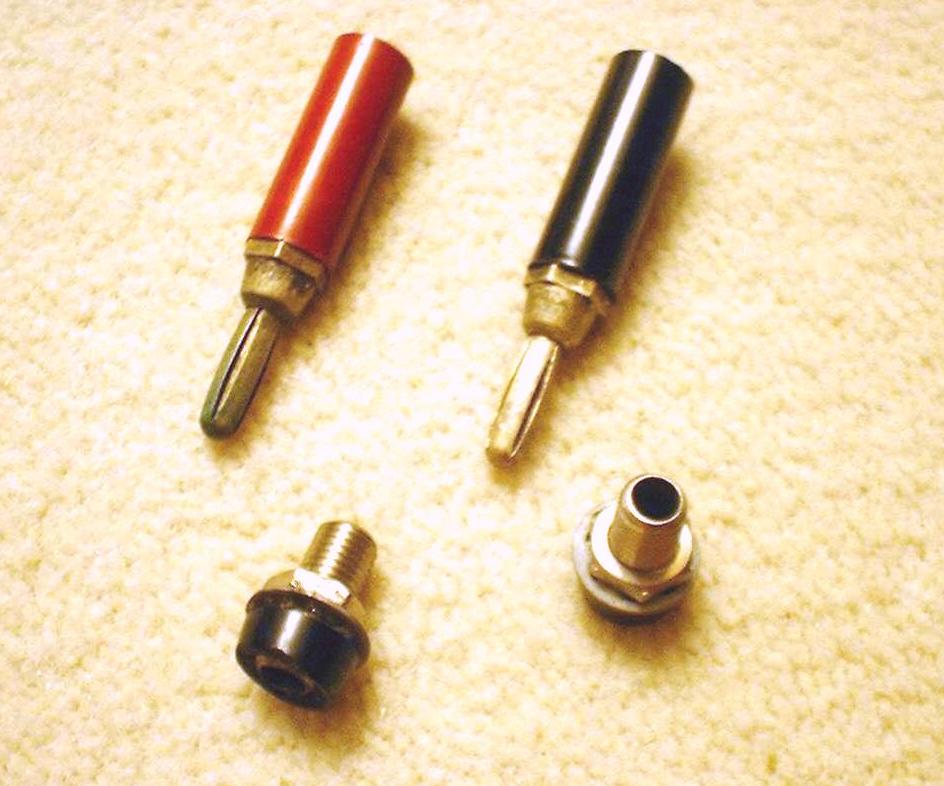
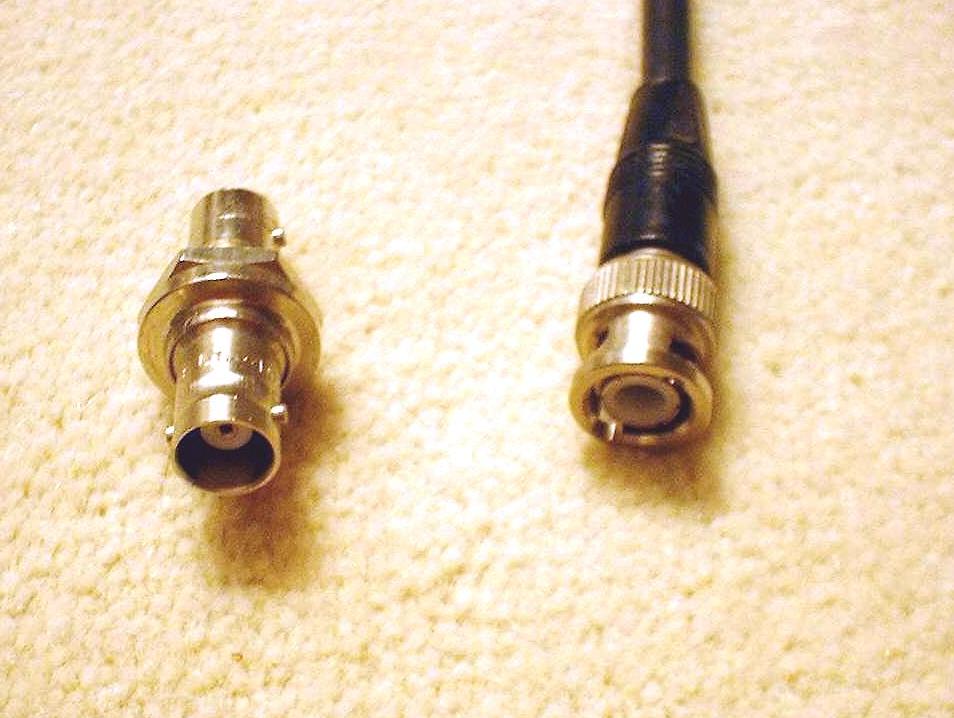
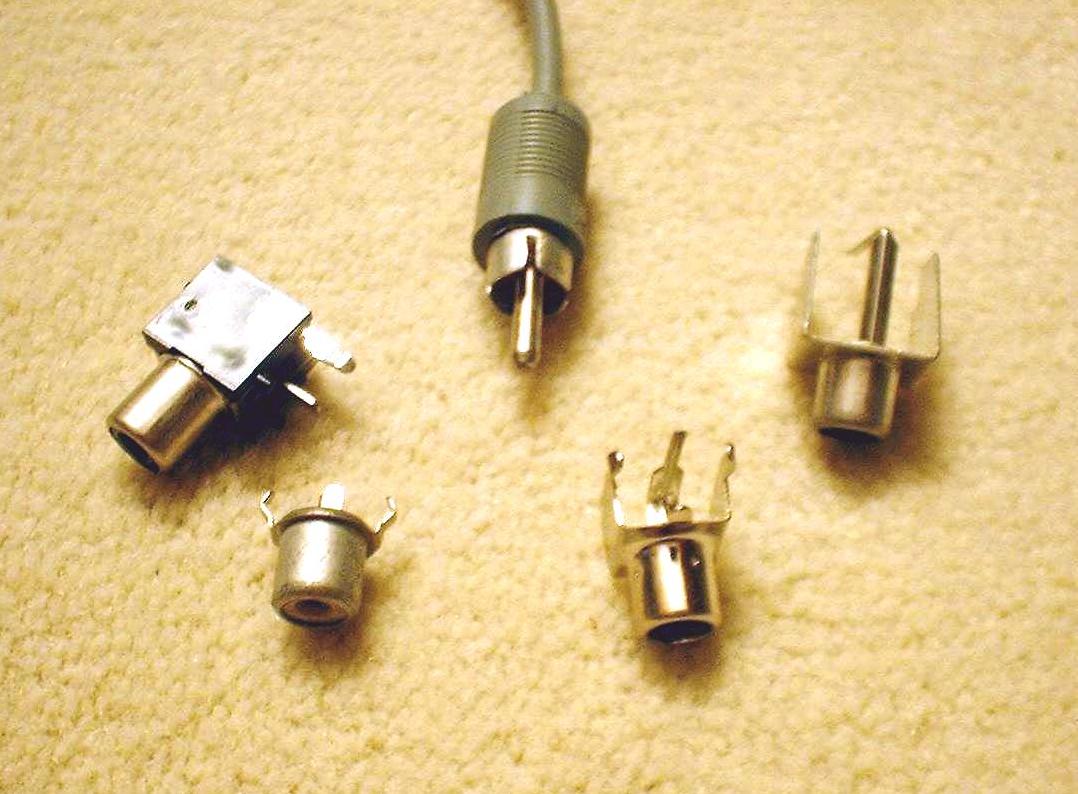
There are various ways to terminate COAX cable. COAX stands for Co-Axial. A COAX cable has a central wire surounded by a concentric shield wire. COAX is usually used for analog or RF signals. You can use RCA phono connectors, BNC connectors and lots of other types.
Visit Twin Cities Robotics Group
Back to my Home Page http://www.pobox.com/~jsampson
This page is currently maintained by Jeff Sampson